Editing Worklogs in Bulk
Important
To view the Bulk Worklog Editor, you require either the Delete all Worklogs or Edit all Worklogs permission for Jira projects (Project Permissions)s
Manage Worklogs permission per individual team (Tempo Team Permissions)
Manage Worklogs permission for all or multiple teams (Permission Roles for Multi-Team and Full User Access)
You can use bulk editor to edit account work attribute and billable hours for the filtered Logged Time reports, Team timesheet, and Account Timesheet. A maximum of 1000 worklogs can be edited at once. In order to use billable hours, there are some pre-requisites in Tracking Billable Hours Using the Billable Feature. To know how to create an account work attribute, refer to Creating Account work attribute.
To edit Account work attribute and Billable hours of worklogs :
Once you select the Bulk Edit option, you will see all the worklogs displayed as a list with description, date, hours logged, issue, and user. You can select or deselect a single or multiple worklogs using the checkbox. By default, all the worklogs are selected. To deselect all of them, click the checkbox in the header. In order to proceed to the next step, you need to choose at least one worklog.
Tip
If you choose to exit from the screen, you can use the browser's back button. You can perform multiple bulk edit operations with different filters by opening the Bulk Editor in a new tab.
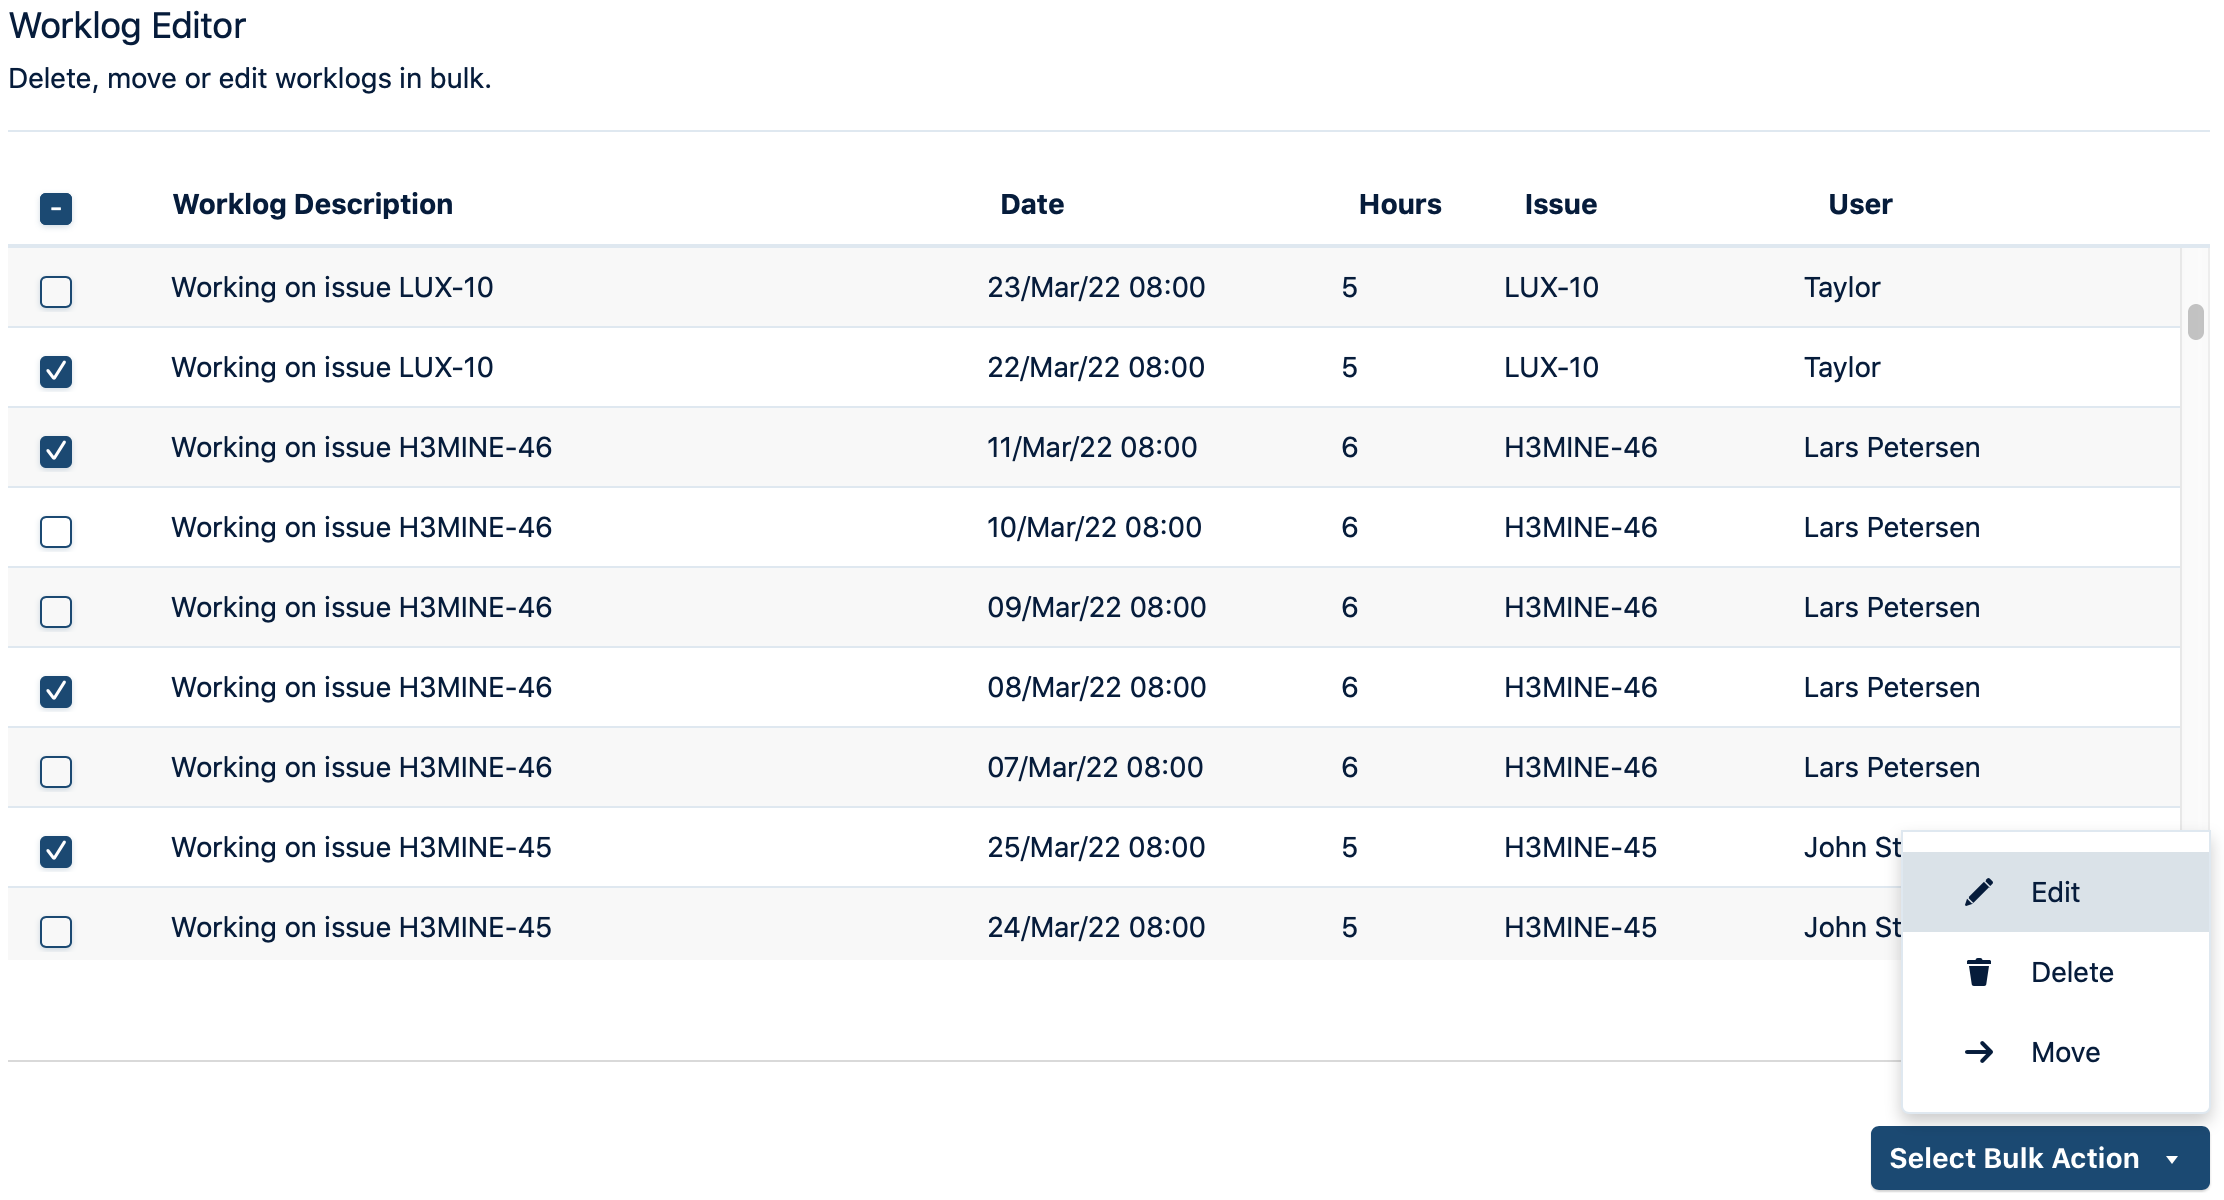
From the Select Bulk Action dropdown, select Edit.
To edit -
Account work attribute - To change the account work attribute (Example, in this case, is Tempo Account. This could be the name you have given while creating work attribute of the type Account), click the dropdown list and choose an option from the list. This list shows all the account(s) from the project including global account(s). You can also clear the account for the selected worklogs by clicking the checkbox Set value to "None"
Note
The checkbox Set value to "None" appears only when the work attribute is not marked as required.
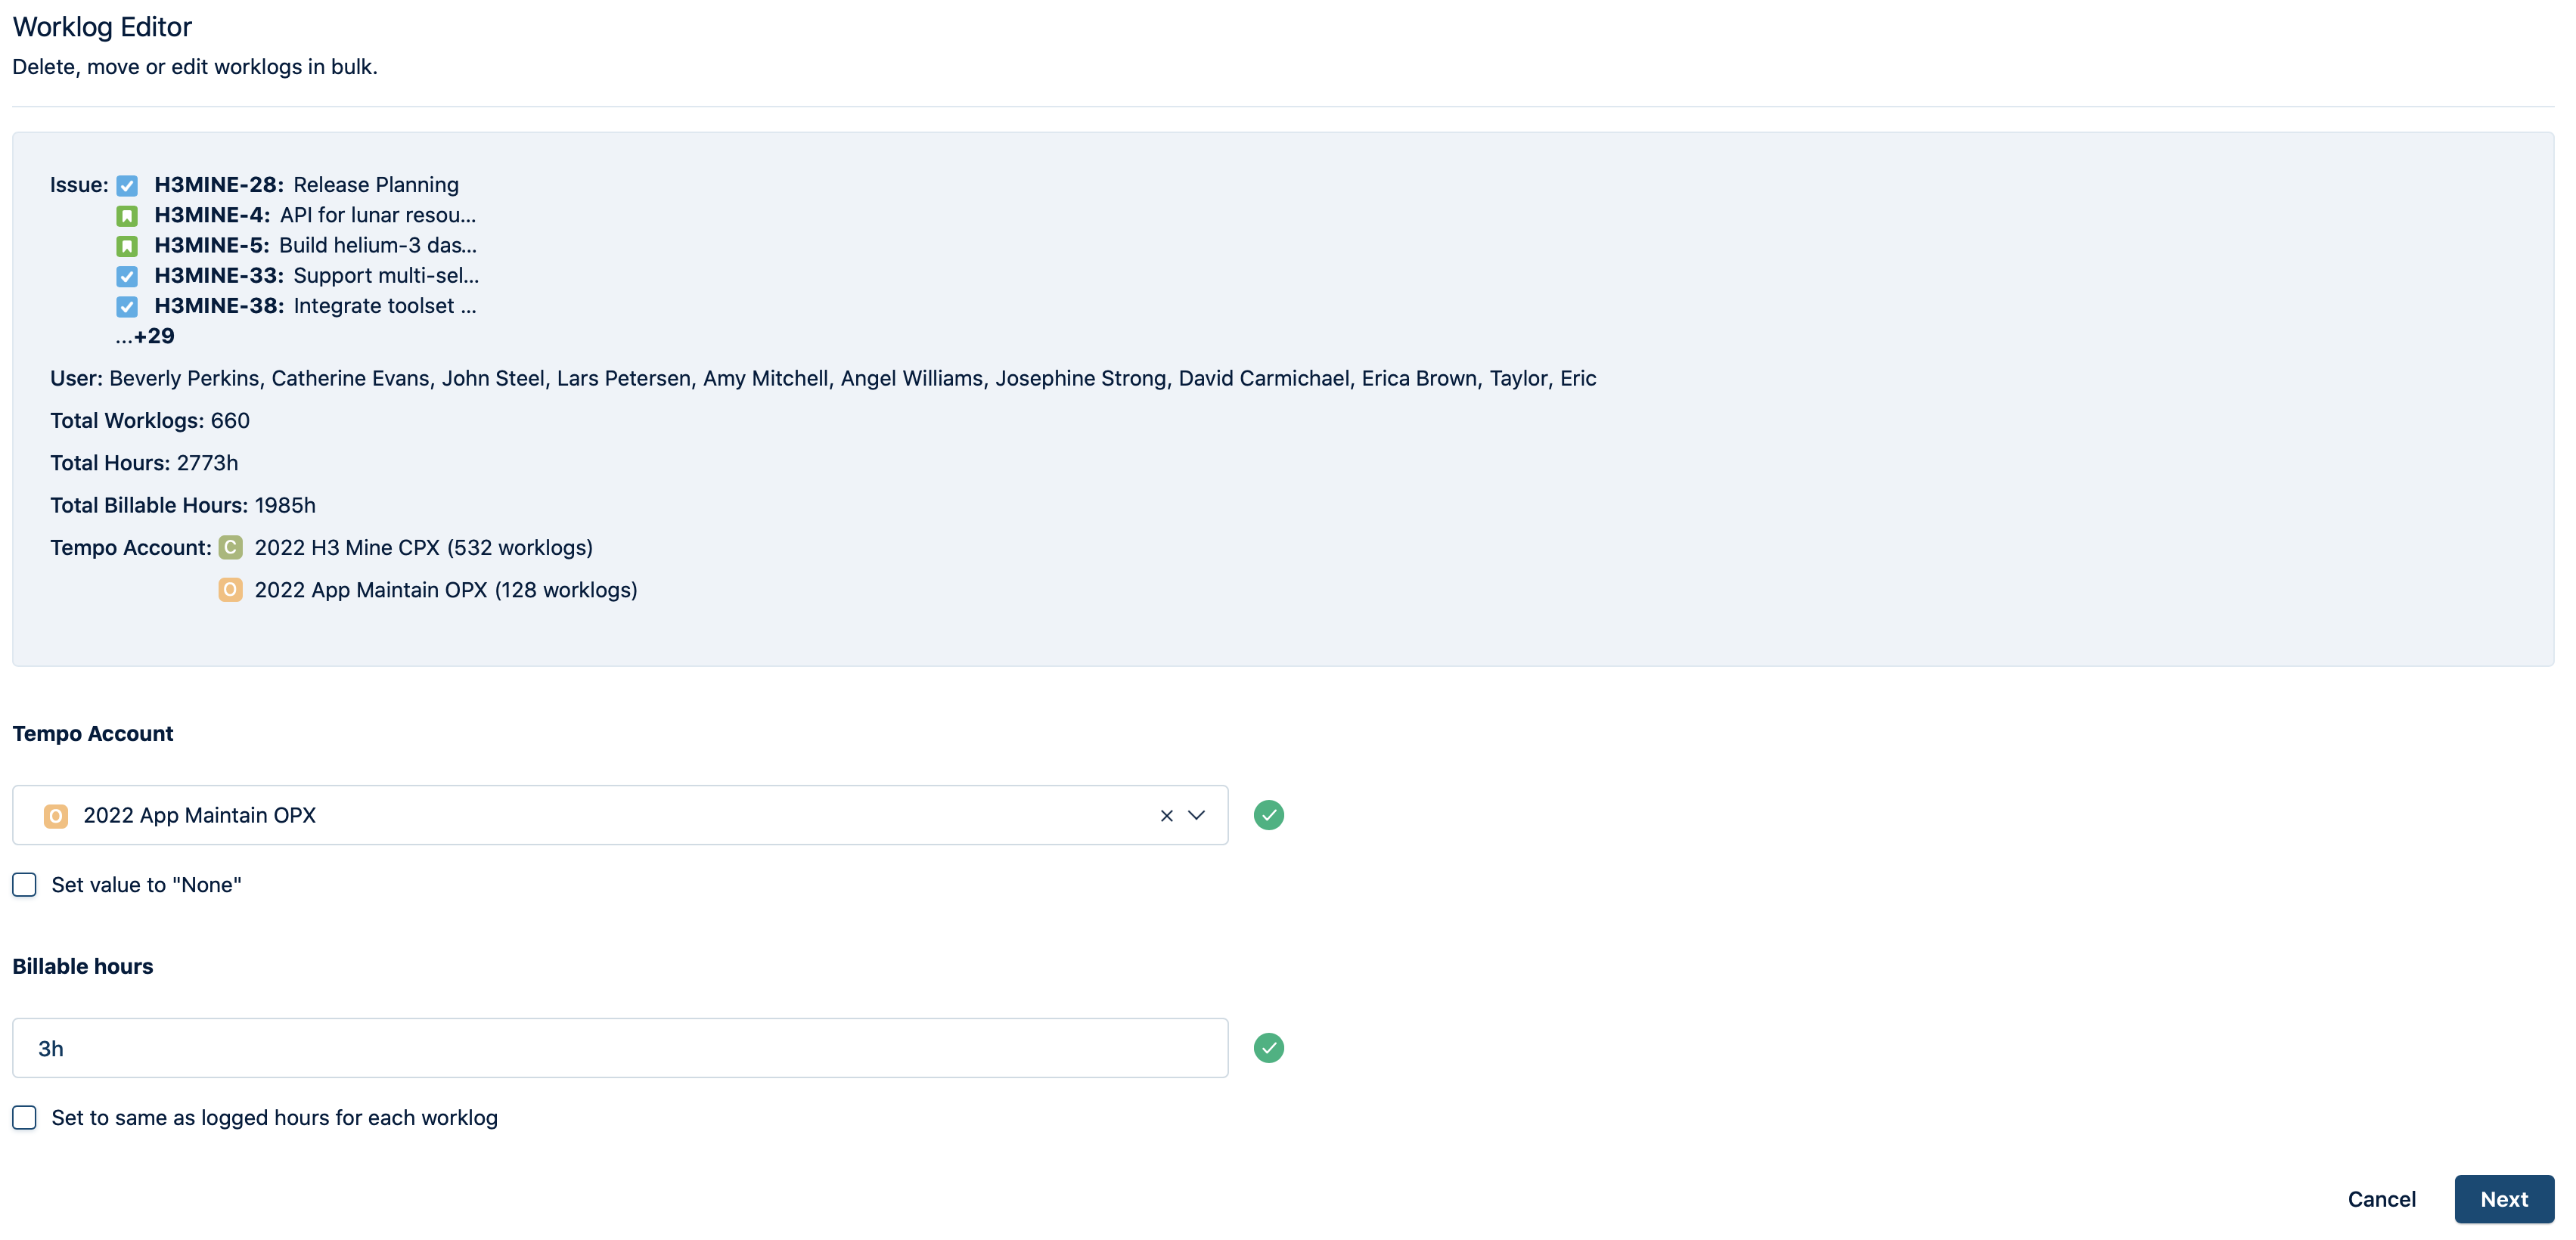
Billable hours - A text box appears to enter the number of billable hours for each worklog. The hours can be 0 or any number of hours that you want to set for an individual worklog. Check the box if you want to set the billable hours same as logged hours.
Tip
When you enter a number, it automatically displays as hours. The number after the decimal is considered as minutes. Example: If you input 4.5, it is converted to 4h 30m.
Click Next to continue. A confirmation dialog appears to confirm the changes you made. Click Confirm to proceed or Cancel to exit the operation.
A success message is displayed when the worklogs are edited. If the operation fails, a list of error messages will be displayed. Click Acknowledge to go back.