Saving, Sharing, and Deleting Reports
How to save, share and delete dynamic and fixed period reports, as well as save edited reports.
Important
Viewing worklogs for your team members in Tempo Reports requires the View Worklogs and Browse Projects permissions. To see worklogs for other users in a project, you need to have the View All Worklogs permission.
To report on planned time, you need to have Tempo Planner installed. Viewing plans requires the View Plans permission.
You can build a library of reports and use them to quickly generate reports with your selected filters and groupings, using both fixed and dynamic date periods. When you save a report, you are saving the report layout: you are not saving the data. Every time you run the report, the report data is refreshed to include any changes.
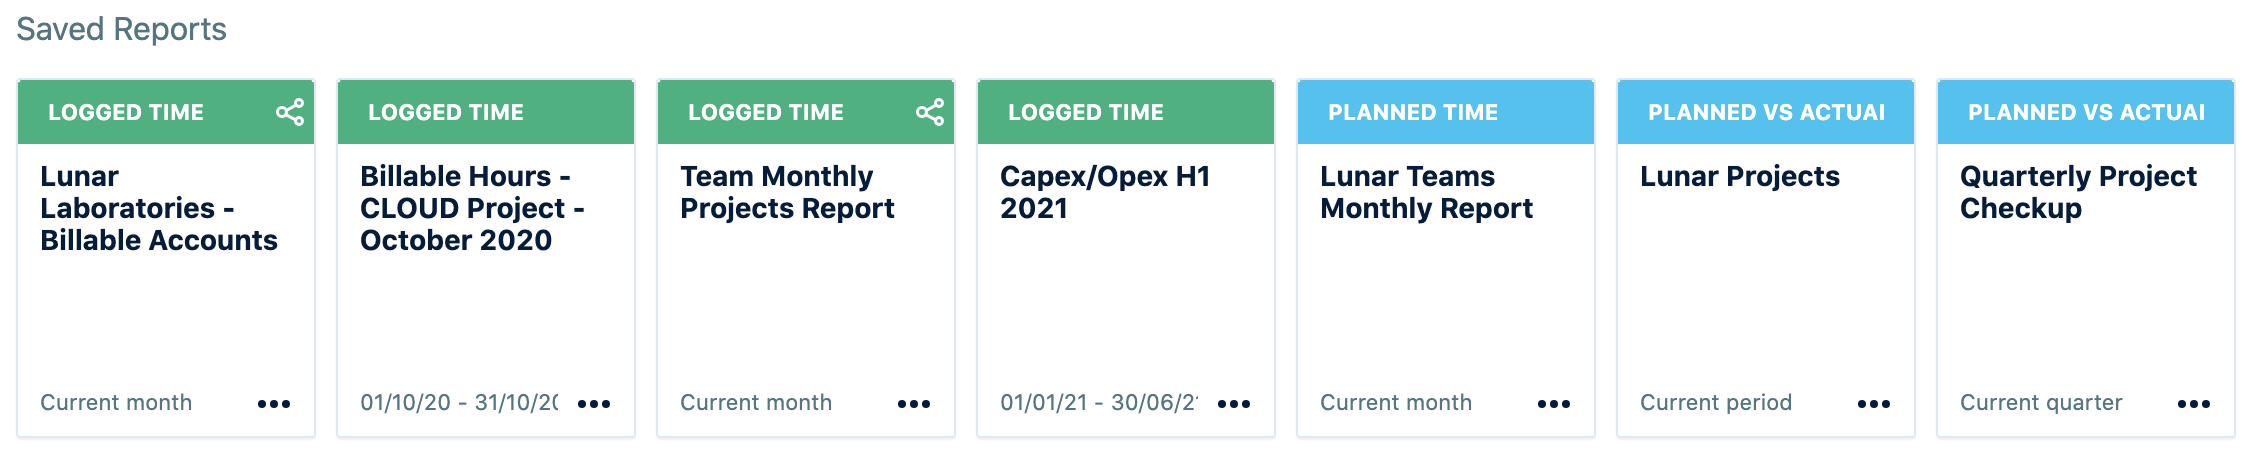
Reports are saved to the Saved Reports section of the Reports where you can load them again.
Dynamic Period:
You can set up dynamic reports for regular use, such as a Monthly report. By default, reports are generated for the current time period as defined in your system. You can select other periods using the date picker, such as Quarter, Month, and Week. The periods are dynamic, meaning that each time you run the report, it will always show data for the relevant period. For example, if you save a report showing data for Last Month, the report will always show data for the previous month relative to the current time. The report will update automatically if time records or your permissions are modified.
Fixed Period:
You can save static reports for your records. Fixed-period reports are for a specific date range, for example, a specific week or selected days. If you have selected a fixed period for your report, such as by setting the From and To dates using the date picker, the report will be saved with the date range you selected. When you run the report, the data will be the same as before, but will update if any time records were changed for the specified report time period.
Saving Reports
In the Reports overview, create the report. For more information about creating reports, see Creating Reports.
Click Save at the top. Enter a name for your report, and then click Save report.
A tile with the report name will be displayed on the main Reports page under Saved Reports. You can use this tile to load the report again whenever you need it.
Saving Edited Reports
You can edit a saved report and view results immediately, and then select to update the saved report or create a new one.
To save an edited report:
In the Reports view, load your previously saved report.
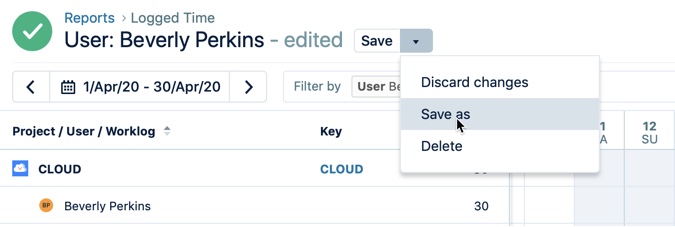
Edit the report as desired. The report name is labeled edited.
If you want to overwrite the existing report, click Save. If you want to save the edited report as a different report, click the drop-down arrow next to Save, select Save as and enter the name of your report.
Tip
You can delete your changes and return to the report as it was the last time you saved it. Select Discard changes on the Save drop-down menu.
Sharing Reports
You can share the saved report filter with other users in your organization so that they get the report updates automatically.
To share a report:
In the Reports view, go to the Saved Reports section.
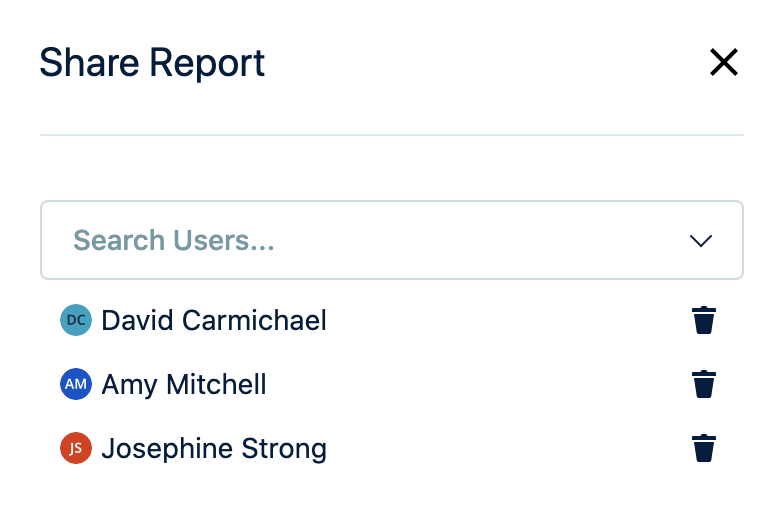
Click the report you want to share and select the Share icon on the top-right view of the Share reports.

You can add multiple users from your organization by typing their name in the text field. To delete a selected user, click the Delete icon.
A share icon is displayed to identify the reports that are shared with you or the reports that you shared with the other users in the Saved Reports section.
If you choose to save the report that was shared with you, click the drop-down arrow next to Save, select Save as and rename the report or save a copy with the existing name. To stop seeing the shared report from the Reports section, select Stop seeing this report.

Deleting Reports
You can delete reports you no longer need. This can be done from within the report itself or in the Reports overview.
To delete a report:
Do one of the following:
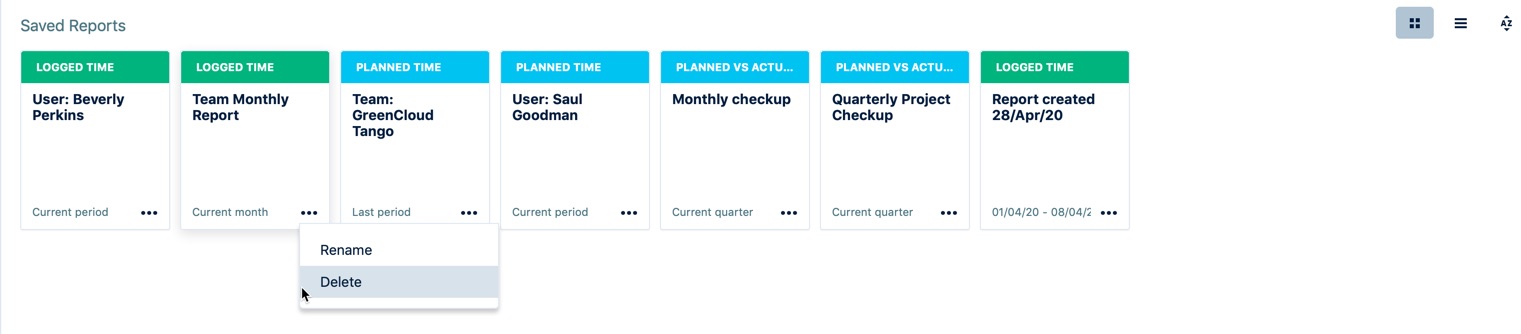
Find the report you want to delete in the Reports overview. Click the ellipsis (...) for the report, and then select Delete.
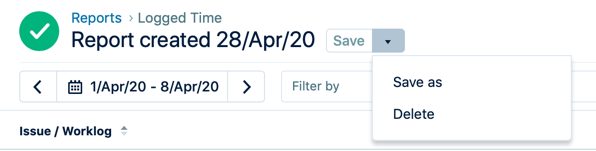
In the report you want to delete. Click the drop-down arrow on the Save button, and then select Delete.
Click Delete again to confirm.